Summary:
You want to swim in January. You want privacy. You want a pool that doesn’t shut down for eight months of the year. Indoor pool construction makes that possible, but it’s not as simple as building a pool and putting a roof over it. The structure, the air quality, the permits, the systems that keep humidity in check—all of it has to work together, or you’re left with condensation on the walls and a pool you can’t use comfortably. If you’re serious about building an indoor pool in Nassau County, here’s what actually goes into it.
What Makes Indoor Pool Construction Different
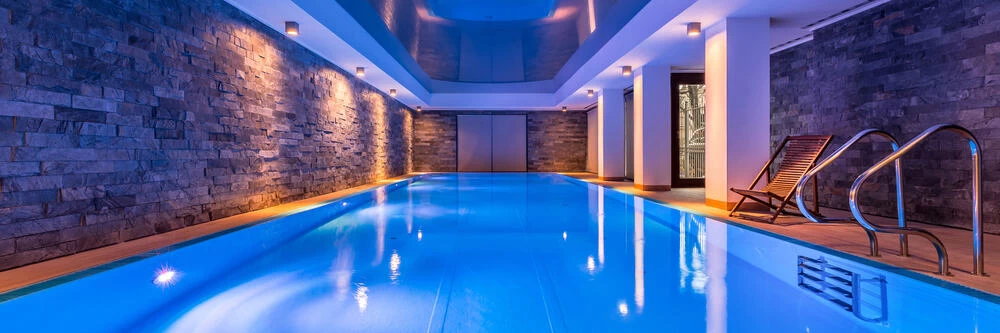
Indoor pool construction isn’t outdoor pool construction with a ceiling. The moment you enclose water, you’re dealing with moisture, evaporation, and air quality in ways that don’t exist outside. That means engineering the space to handle humidity without damaging your home.
The pool itself might be gunite, fiberglass, or vinyl liner—same options as outdoor pools. But everything around it changes. You need dehumidification systems, proper ventilation, waterproofing that protects the structure, and enough ceiling height to avoid that claustrophobic gym-pool feeling. Most indoor pools need at least 14 to 16 feet of clearance, and the room should extend about 10 feet beyond the pool’s footprint in every direction.
Then there’s the foundation. You’re not just supporting a pool shell. You’re supporting the weight of thousands of gallons of water inside a building, which means structural engineering and reinforced foundations are part of the conversation from day one.
Indoor Pool Installation Requirements You Can't Skip
If you’re building an indoor pool in Nassau County, you’re not just pulling a building permit. You’re coordinating structural, mechanical, electrical, and plumbing permits because indoor pools touch all of those systems. Nassau County requires additional documentation for indoor pools compared to outdoor installations, especially around HVAC and structural load calculations.
The air handling system is non-negotiable. Indoor pools generate constant moisture, and without proper dehumidification, you’ll end up with mold, peeling paint, and corroded fixtures. Most systems are designed to maintain relative humidity between 50 and 60 percent, with air temperature running about two to four degrees warmer than the water. That balance keeps evaporation under control and prevents condensation on windows, walls, and ceilings.
Ventilation codes typically follow ASHRAE standards, which call for about 0.48 cubic feet per minute of airflow per square foot of pool and wetted deck area. That’s not something you can eyeball. It requires engineered ductwork, proper air distribution, and equipment that’s sized correctly for your space. Cutting corners here doesn’t just make the room uncomfortable—it can compromise the integrity of the building over time.
Waterproofing is another layer. Indoor pools are often built below grade or partially below grade, which means groundwater infiltration is a real risk. The shell needs to be watertight, and the surrounding structure needs vapor barriers and drainage systems to keep moisture from migrating into walls or the foundation. If your water table is high, that adds complexity and cost, but it’s not optional.
And then there’s the electrical work. Pool pumps, underwater lighting, dehumidifiers, and HVAC systems all pull significant power. You’re easily looking at 100 amps or more just for the pool area, and all of it has to be bonded and grounded according to code. Electrical inspections happen at multiple stages, and any mistakes can delay the project or require expensive rework.
How Much Does Indoor Pool Construction Actually Cost
Indoor pool construction costs more than outdoor pools, and the range is wide. Nationally, you’re looking at somewhere between $40,000 and $200,000, with an average around $95,000. But that’s just for the pool and immediate systems. If you’re building a new structure to house it, add tens of thousands more for framing, roofing, insulation, and finishes.
The pool shell itself runs $75,000 to $200,000 depending on size, materials, and features. Gunite pools tend to be on the higher end but offer the most design flexibility. Fiberglass pools install faster and require less long-term maintenance. Vinyl liner pools cost less upfront but need liner replacements every seven to ten years.
Then you have the systems. A commercial-grade dehumidifier can run $5,000 to $15,000 or more depending on the size of the space and the capacity you need. HVAC integration, ductwork, and controls add to that. If you’re heating the pool water, that’s another system to budget for—whether it’s a dedicated pool heater or integration with your home’s boiler.
Don’t forget the monthly operating costs. Between energy for heating, dehumidification, and circulation, plus chemicals and routine maintenance, you’re typically looking at $300 to $500 per month. That’s assuming you’re running efficient equipment and keeping up with regular service.
Permits, engineering, and inspections add a few thousand dollars, but they’re not the place to cut costs. Nassau County inspectors will check structural work, plumbing, electrical, and mechanical systems at different stages. If something doesn’t pass, you’re stuck until it’s corrected, and that delays everything else.
One cost people overlook is the automatic pool cover. It’s not required, but it’s one of the smartest investments you can make for an indoor pool. Covers reduce evaporation by up to 95 percent, which means your dehumidifier doesn’t have to work as hard, your heating costs drop, and the air quality stays better. They typically run $5,000 to $15,000, but the energy savings pay that back over time.
Steps to Building a Pool Indoors
Building an indoor pool isn’t a single project—it’s a series of coordinated phases that have to happen in the right order. Miss a step or rush the sequence, and you’re either reworking something or dealing with problems that show up after the pool is finished.
It starts with design. You’re not just picking a pool shape. You’re planning the room, the ceiling height, the placement of equipment, the ductwork, the drainage, and how everything integrates with your home’s existing systems. If you’re building this into a new house, that’s easier. If you’re retrofitting an existing space, you’re working around structural limitations and utility lines that are already in place.
Once the design is locked in, the next step is engineering. A licensed structural engineer has to review the plans and confirm that the foundation, walls, and floor can handle the load. That’s especially important if you’re building in a basement or adding a pool to an existing structure.
Permits, Excavation, and the Build Sequence
Permits come next, and they take time. You’ll need approvals from the local building department, and depending on your property, you might also need sign-off from your HOA or zoning board. Nassau County requires separate permits for the pool structure, electrical work, plumbing, and mechanical systems. Trying to skip permits or combine them incorrectly will stop your project cold.
Once permits are in hand, excavation begins. If you’re building in a basement or enclosed space, access is limited, so equipment has to be smaller and the process takes longer. The excavation has to be precise because there’s no room for error when you’re working indoors. The hole gets dug, the base gets compacted, and any necessary drainage systems go in before the pool shell.
Steel reinforcement comes next. Rebar is installed according to the structural plans, forming the skeleton of the pool. This has to be tied correctly and positioned so that when the concrete is poured, the steel is fully encased. Inspectors will check this before you’re allowed to move forward.
Plumbing and electrical rough-ins happen before the shell is finished. All the lines for circulation, filtration, heating, returns, drains, and lights get installed and tested. This is also when the equipment pads and panels are set, and any conduit for future systems gets placed. Changes after the shell is poured are expensive and messy, so everything has to be right the first time.
Then comes the shell. For gunite pools, that means spraying pressurized concrete over the rebar framework and sculpting it to the final shape. It takes a few days to cure. For fiberglass pools, the pre-fabricated shell is craned into place and set on a prepared base. Vinyl liner pools use a frame that gets assembled and braced before the liner is installed.
HVAC, Finishes, and Final Inspections
While the pool shell is curing or being set, the HVAC work begins. Dehumidification systems get installed, ductwork gets run, and controls get wired. This is where most of the complexity lives because the system has to be sized correctly, balanced properly, and integrated with your home’s existing climate control if applicable.
The air handling unit pulls humid air from the pool room, removes moisture, and either exhausts it or recirculates conditioned air back into the space. Heat recovery systems capture warmth from the dehumidification process and use it to heat the pool water or the room itself, which cuts down on energy waste. These systems aren’t cheap, but they’re what make an indoor pool livable.
Once the shell is ready and the HVAC is roughed in, the finishes go on. Tile gets installed along the waterline, coping goes around the perimeter, and the interior surface gets its final coat—whether that’s plaster, pebble, or another finish. Deck work happens around the same time, along with any railings, steps, or built-in features.
Lighting, both underwater and ambient, gets installed and tested. Equipment gets connected—pumps, filters, heaters, automation systems. Everything gets fired up, checked for leaks, and balanced. The pool gets filled, the water chemistry gets dialed in, and the startup process begins.
Final inspections happen in stages. Structural, plumbing, electrical, and mechanical systems all get signed off separately. If something doesn’t pass, it has to be corrected before you can move to the next phase. Once everything is approved, you’re clear to use the pool, but it’s smart to schedule a walkthrough with us so you understand how to operate and maintain everything.
Is Indoor Pool Construction Right for Your Home
Indoor pool construction gives you year-round access, complete control over your environment, and a level of privacy that outdoor pools can’t match. But it’s a bigger investment—financially and logistically—than most people expect. The pool is just one piece. The structure, the systems, the engineering, the permits—it all has to come together correctly, or you’re left with problems that are expensive to fix after the fact.
If you’re ready to move forward, work with a builder who’s actually done indoor pools before. Not every pool company has experience with the HVAC integration, structural coordination, and mechanical systems that indoor installations require. You want someone who understands the full scope and can manage the process from design through final inspection.
We’ve been building custom pools across Nassau County and Suffolk County for years, and we handle everything from initial design and 3D renderings to full installation and system integration. If you’re thinking about an indoor pool, start the conversation early so you know what you’re working with.
Questions about your pool?
Tell us what you need and a JAS Aquatics pool pro on Long Island will get back to you. Prefer to talk now? Call 631-239-8031.